User guide

How to use DioramaControl step by step

This tutorial takes you from first launch to real model railway operation: project setup, drivers, DCC, rolling stock, signals, turnouts, lighting, panels, scenes and automation.

Quick start

  1. Download the app for Windows, macOS or Linux.
  2. Create your first layout project and choose a signalling system.
  3. Add drivers such as Arduino, PCA9685, MCP23017 and a DCC command station.
  4. Configure layout elements: lights, turnouts, signals, sensors and rolling stock.
  5. Build control panels, scenes, sequences and automation rules.

Step-by-step tutorial

1 / 12

Create a project and arrange your dashboard

On first launch, name your project and choose a signalling system. A project stores your layout configuration, rolling stock, drivers, control panels, scenes, sequences and automation rules.

The dashboard is the operator workspace. Add widgets for train control, favorite scenes, control panels, upcoming automation and local network access through a QR code.
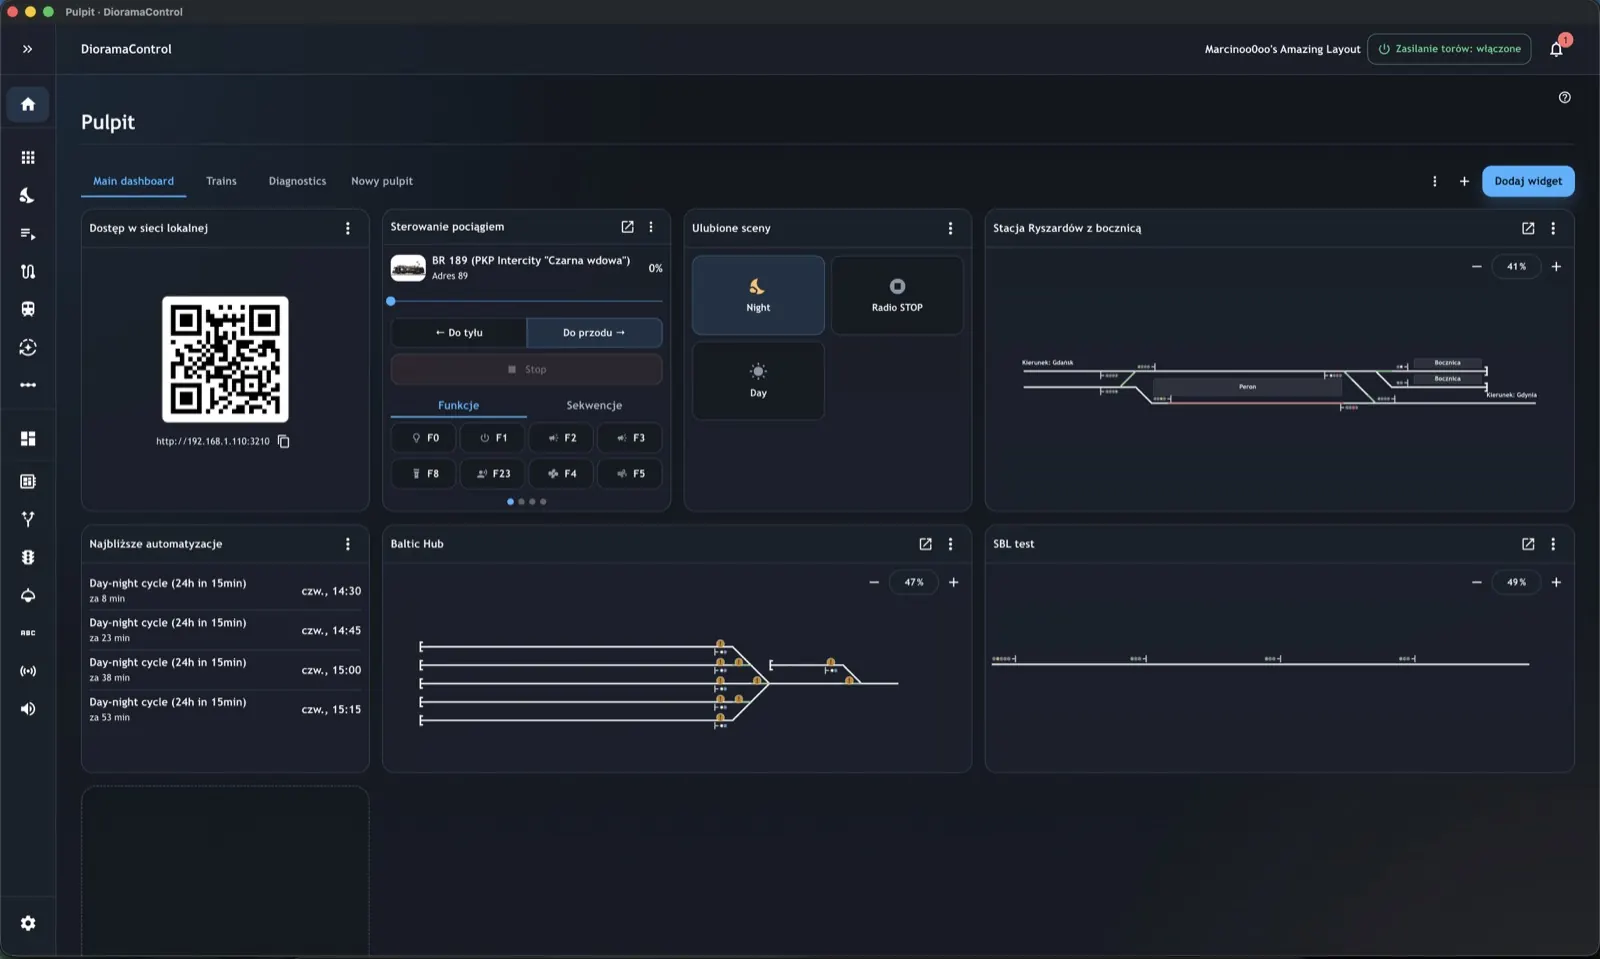
DioramaControl dashboard with rolling stock, control panel, scene, automation and local access widgets.
2 / 12

Add drivers and prepare ports

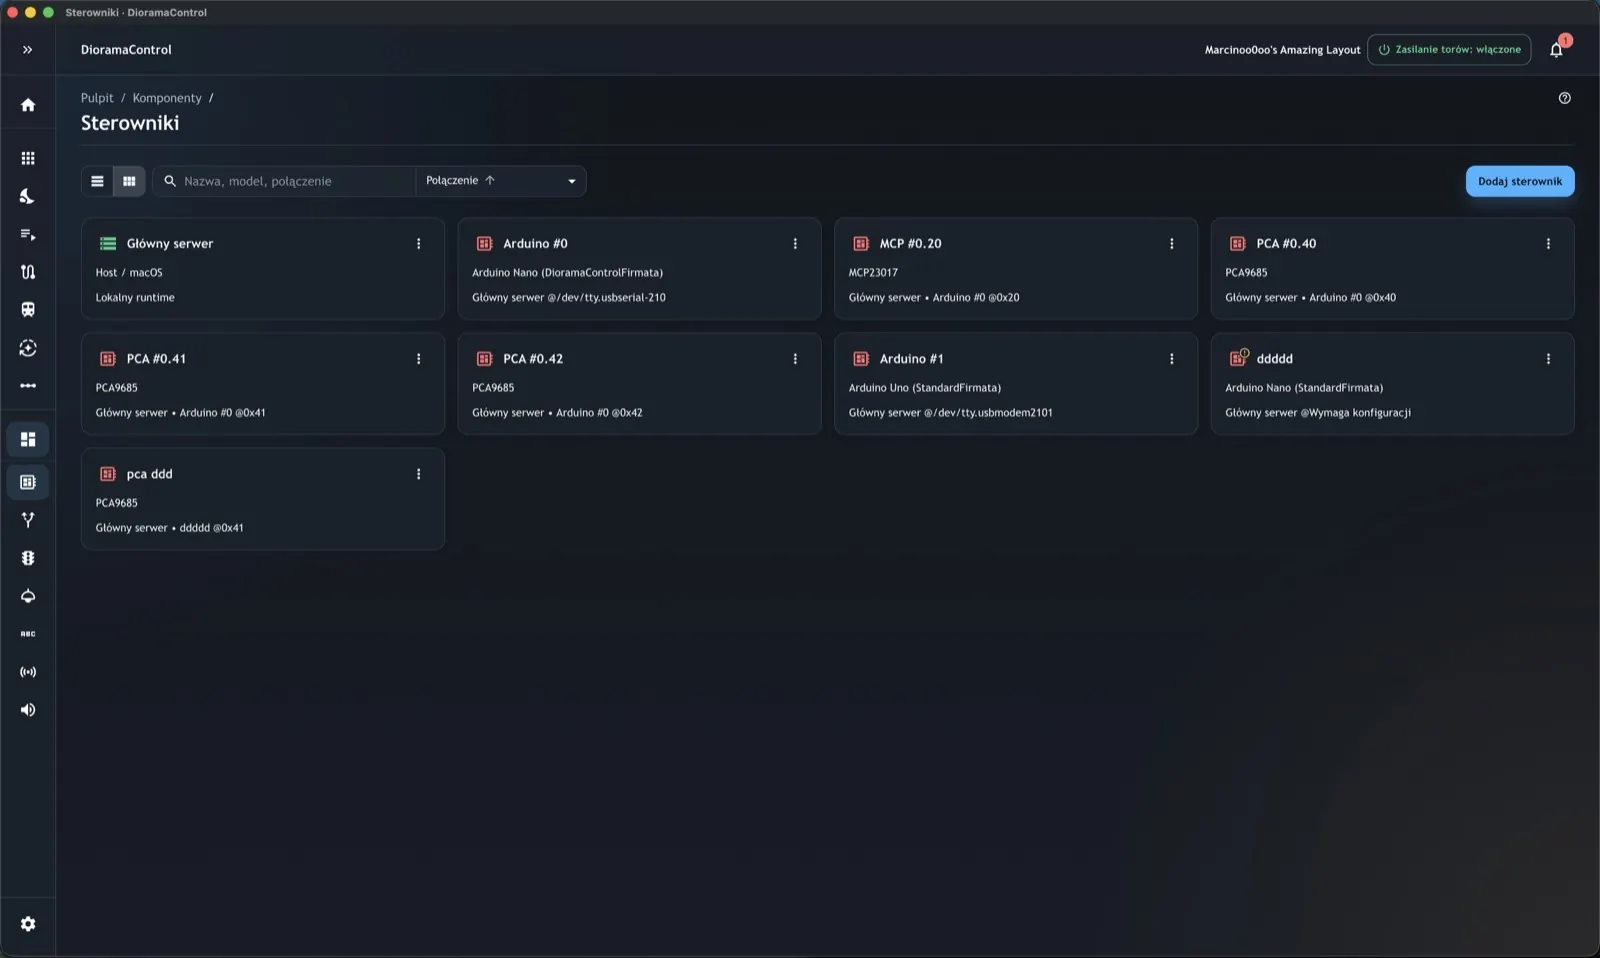
Open Components -> Drivers and add the devices that physically operate your layout: the local server, Arduino boards, PCA9685 PWM expanders, MCP23017 modules and other input or output hardware.

The app shows connections and keeps port mapping organized, so it is easier to see which outputs drive signals, turnouts, lights, sensors or special modules.

DioramaControl drivers list with the local server, Arduino, MCP23017 and PCA9685 expanders.
3 / 12

Configure DCC and the rolling stock list

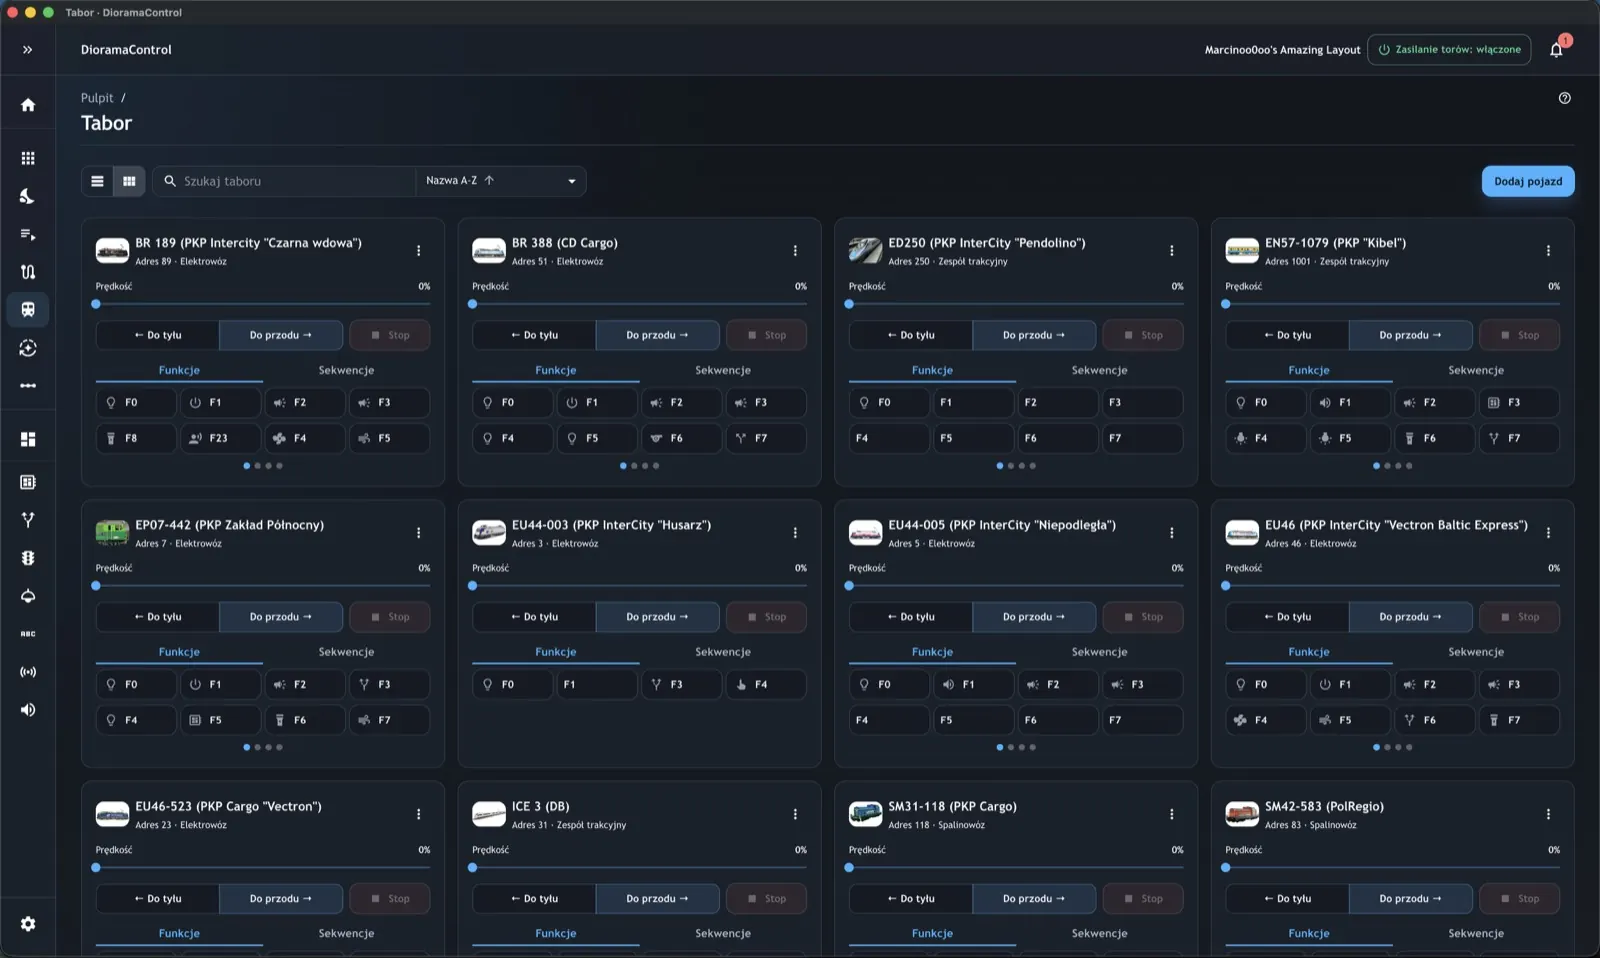
In project settings, choose a DCC command station or simulated mode, then add locomotives and train sets. For each vehicle, define the DCC address, type, decoder, image and decoder functions.

From the rolling stock list you can quickly change speed, direction, stop a train and trigger common functions. The card view lets you operate several vehicles without opening each detail screen.

DioramaControl rolling stock list with locomotive cards, speed control, direction and DCC functions.
4 / 12

Control a locomotive in detail

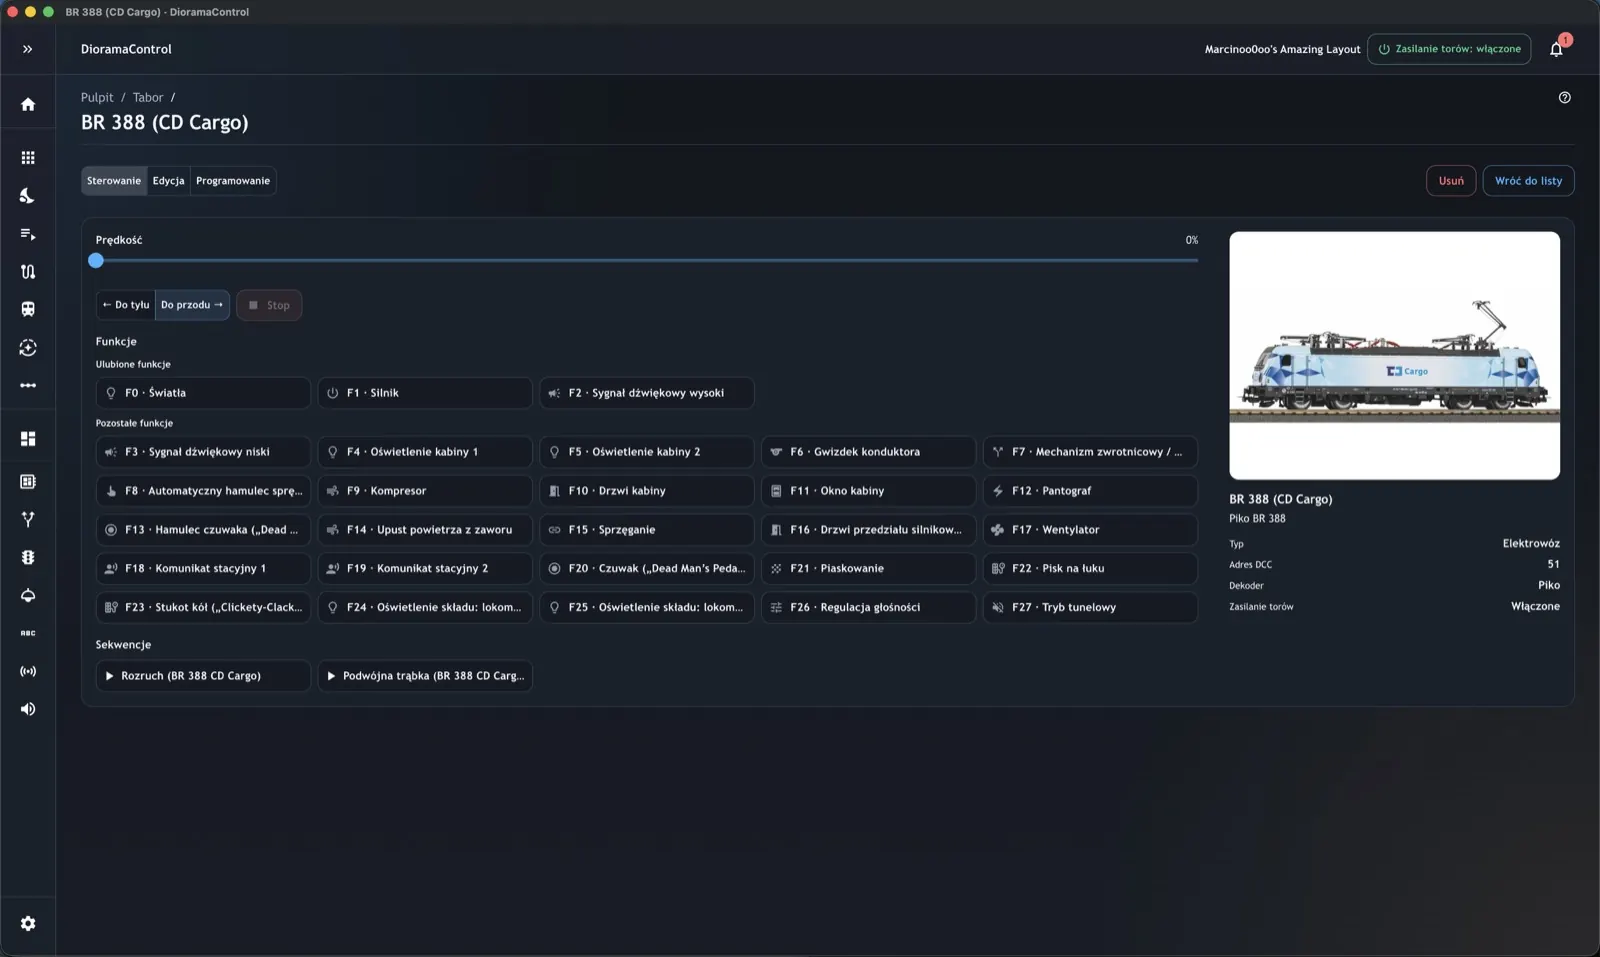
The vehicle detail screen gives more room for operation: speed slider, direction, stop, the full decoder function list and sequences assigned to that locomotive.

Use it to test new vehicles, organize function labels and verify that the DCC address, image, decoder vendor and track power state match your layout.

Locomotive detail view with speed slider, direction controls, DCC functions, sequences and vehicle image.
5 / 12

Build a control panel

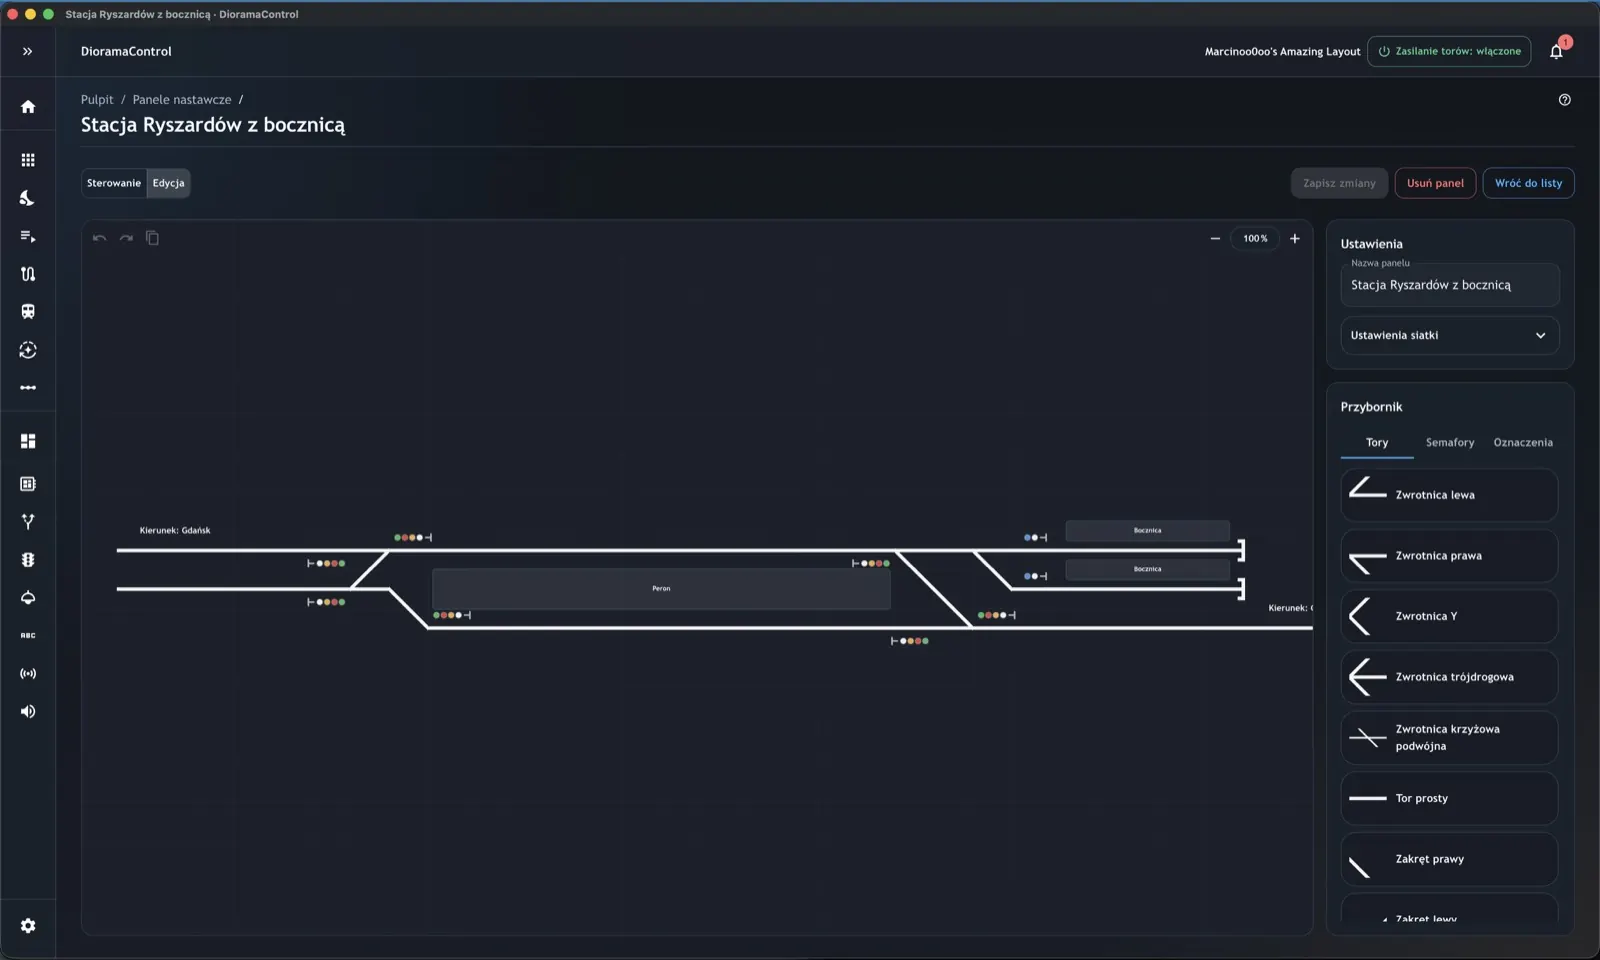
In Control Panels, draw a station or full layout diagram. Add straight tracks, curves, turnouts, signals and labels from the toolbox, then align them on the grid.

Visual elements can be bound to real project components, so the panel becomes an interactive operating surface rather than just a diagram.

Control panel editor with a grid, tracks, turnouts, signals, labels and a toolbox.
6 / 12

Operate the layout from the panel

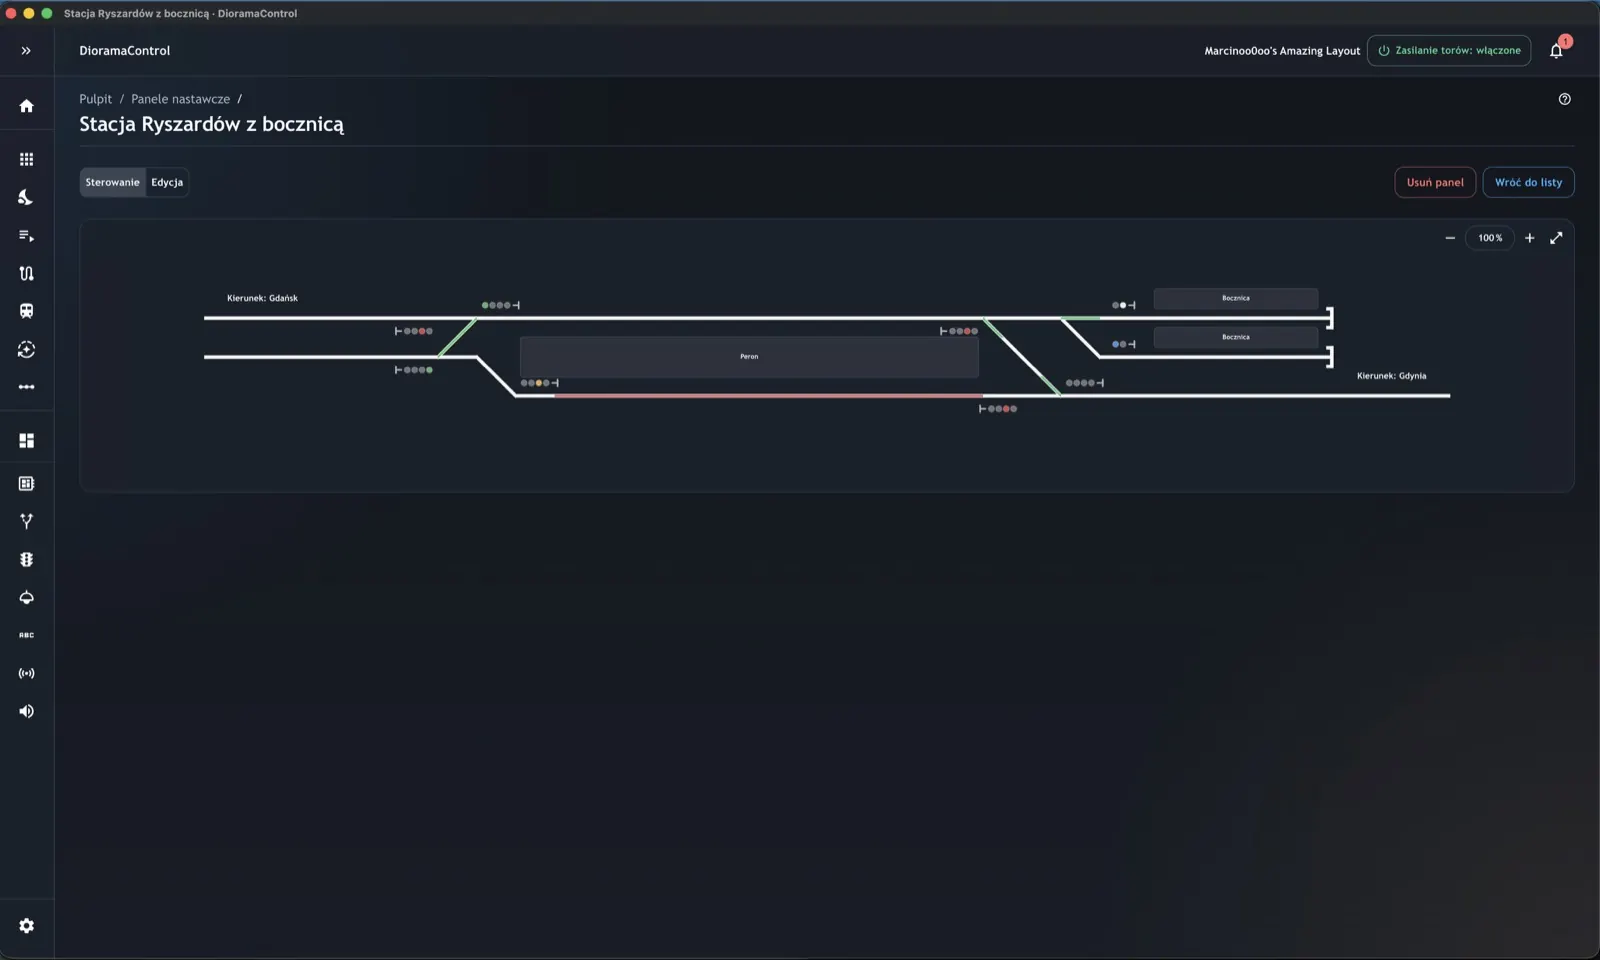
Operation mode shows the panel without editor tools. The operator can switch turnouts, watch signals, use zoom and open the panel fullscreen.

This view is useful during running sessions, exhibitions and club operation because the key layout elements stay in one place instead of scattered across lists.

Control panel operation mode with a track diagram, signals, turnouts, zoom controls and fullscreen button.
7 / 12

Create action sequences

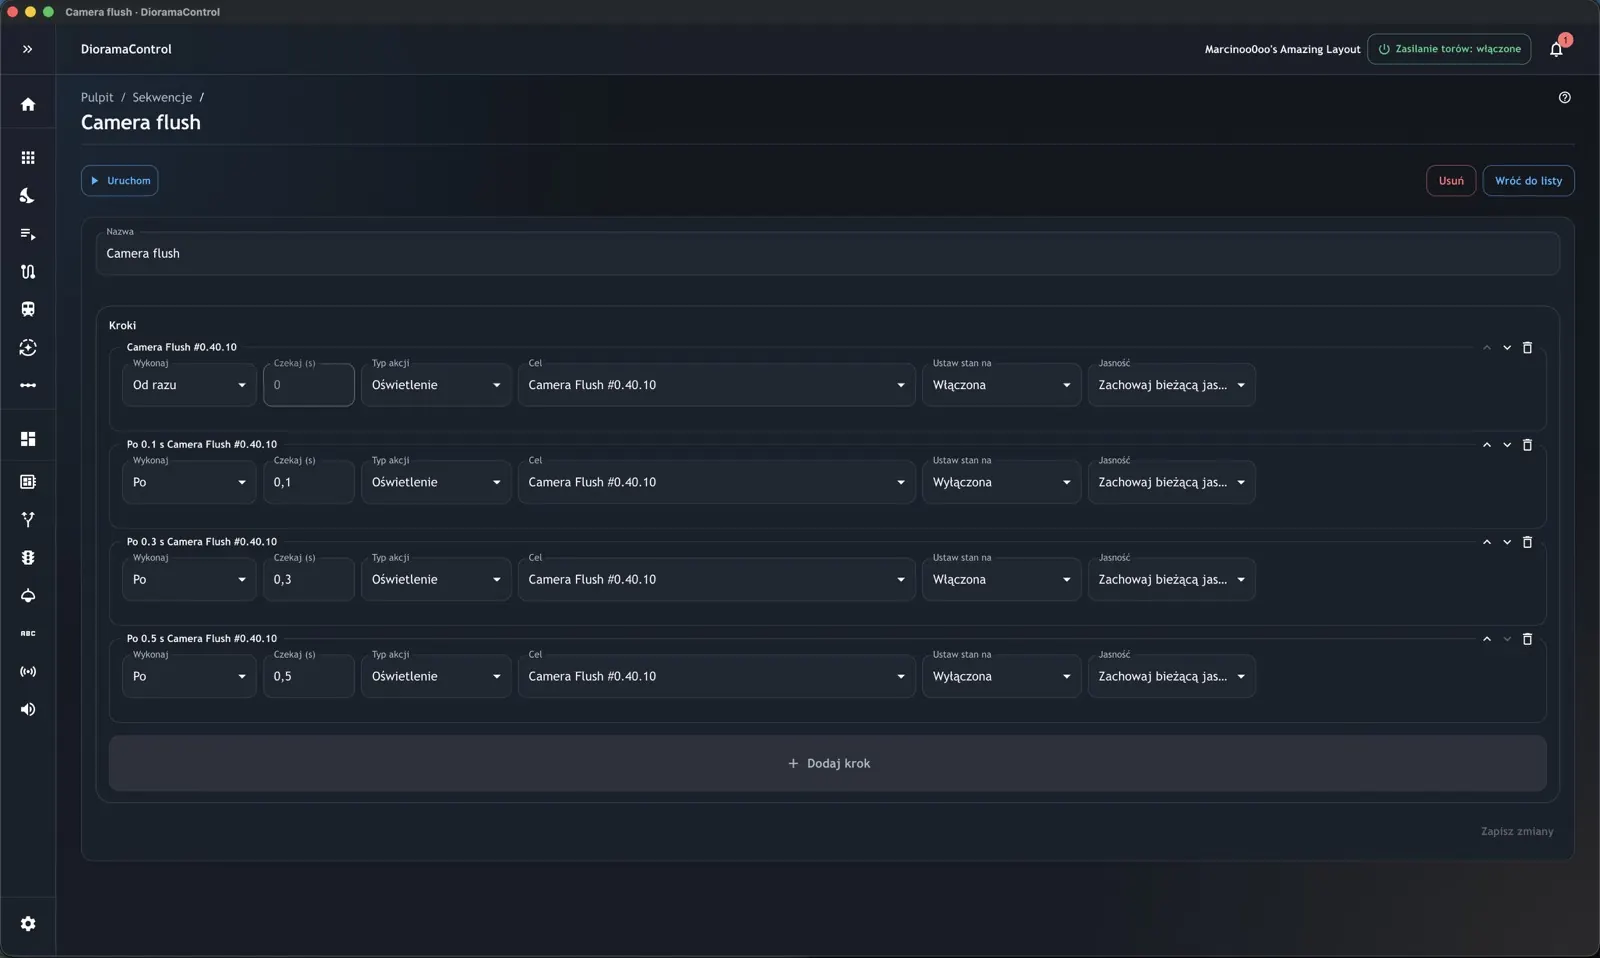
Sequences are chains of actions executed immediately or after a delay. They can control lights, scenes, signals, turnouts, DCC functions and other layout elements.

With sequences, repeatable effects such as a camera flash, departure announcement or locomotive startup procedure can be launched with one button.

Action sequence editor with lighting steps and time delays.
8 / 12

Add automation rules

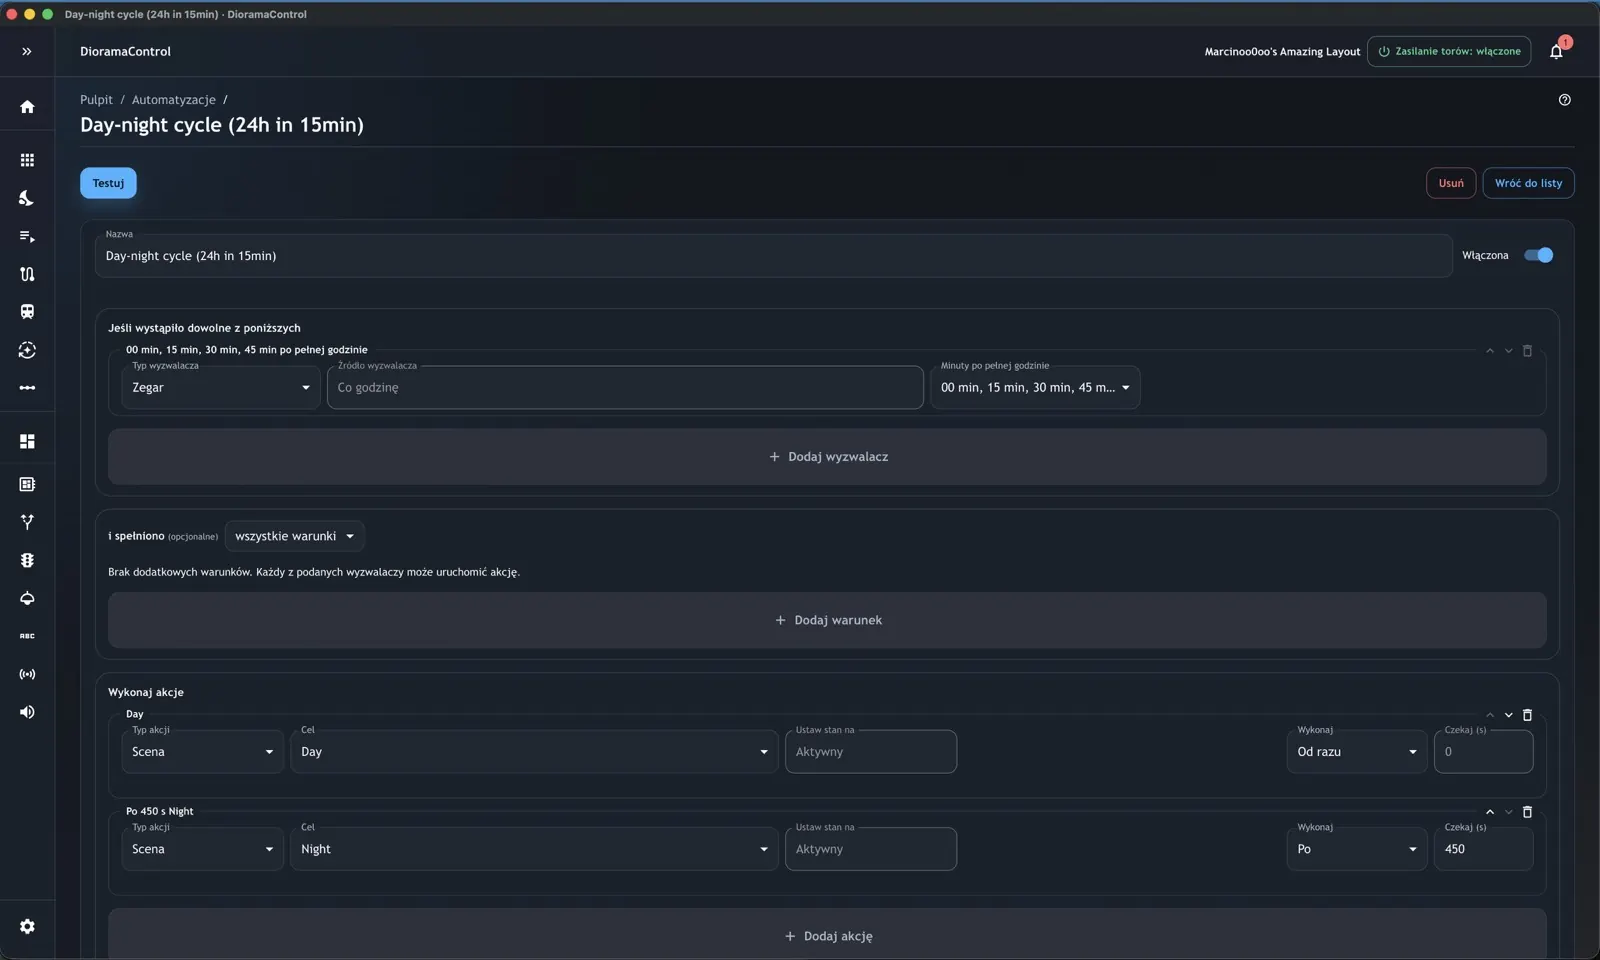
Automation combines triggers, conditions and actions. A trigger can be a schedule, sensor, RFID tag, component state or another layout event.

Actions can run scenes and sequences or change lights, signals, turnouts, track power and DCC functions. This lets you build exhibition and semi-automatic operation without writing code.

Automation editor with schedule trigger, conditions, actions and enabled toggle.
9 / 12

Organize signals and aspects

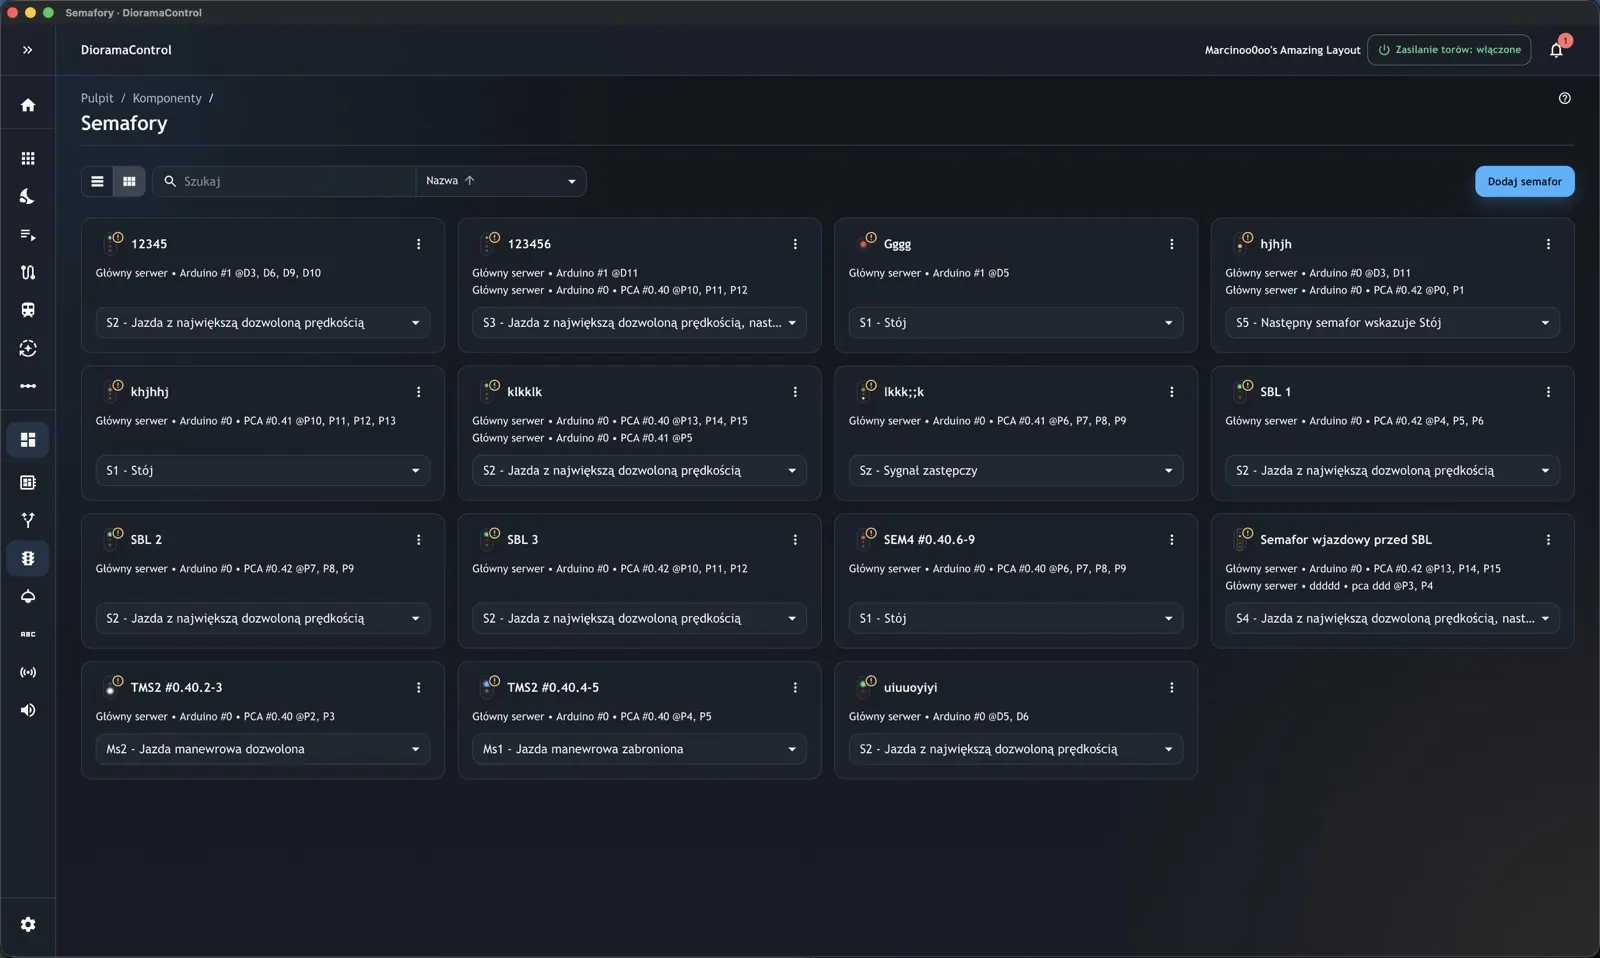
The signals list shows names, driver bindings and the current aspect. From here you can quickly see which signals are configured and which still need ports assigned.

DioramaControl uses signalling profiles, so the same interface can operate different signal types and aspects used on your layout.

Signals list with current aspects, driver bindings and configuration warnings.
10 / 12

Assign signal lamps to ports

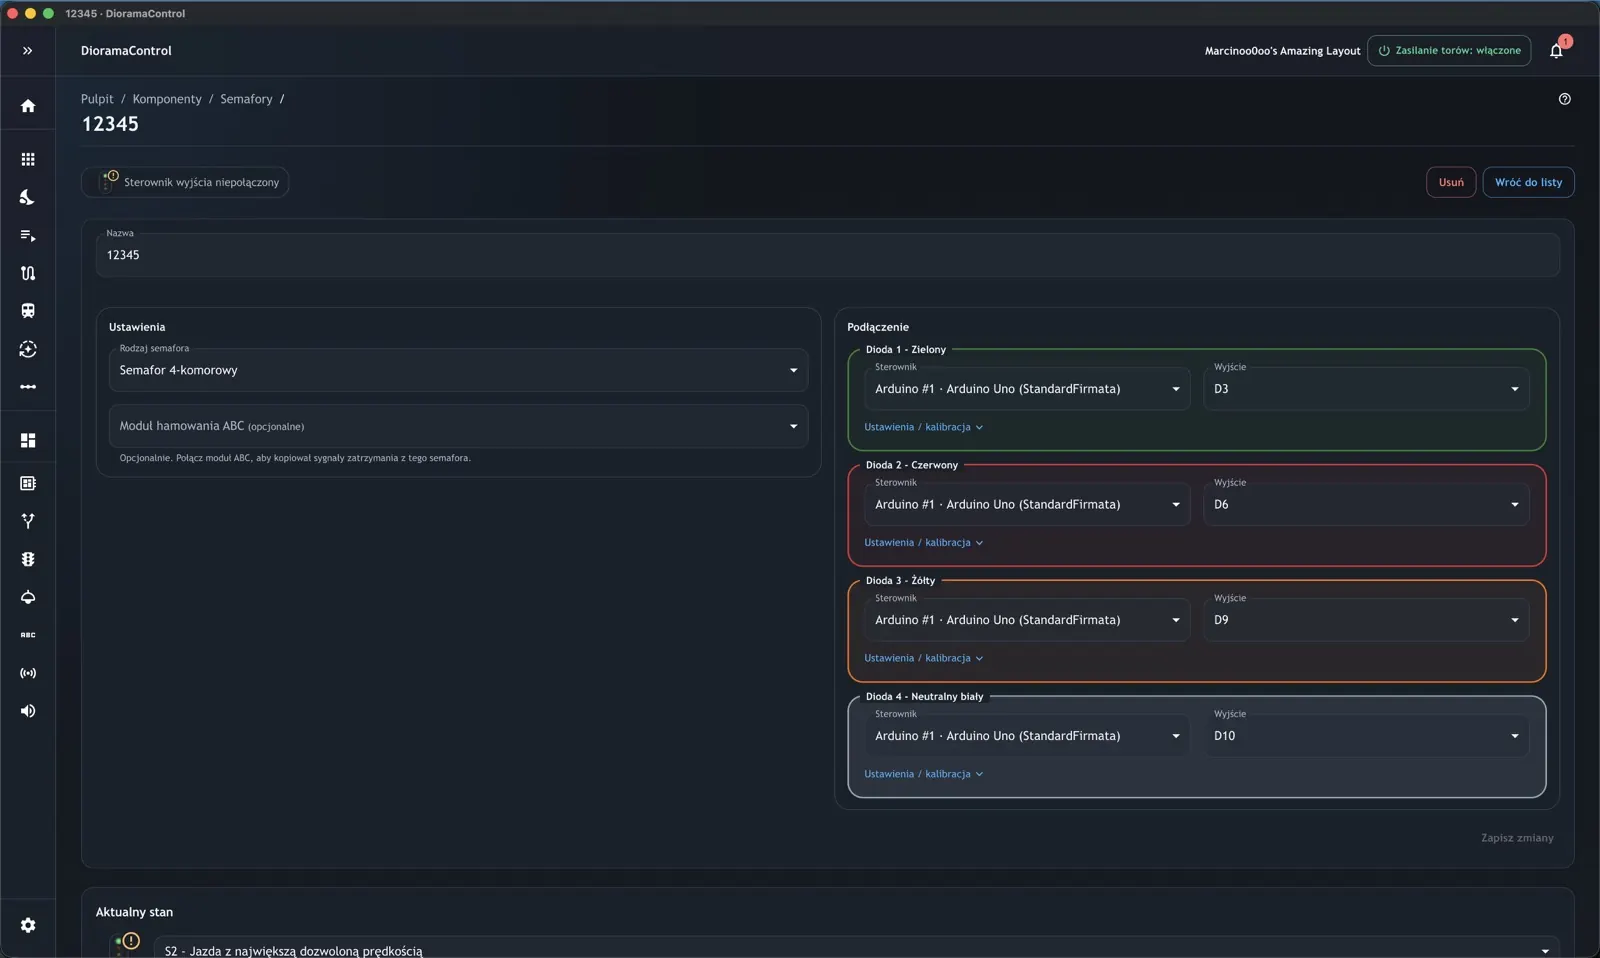
In the signal detail view, choose the signal type and assign every lamp to a driver and output port. Color-coded sections make wiring checks easier before saving.

This screen also gives access to output settings and calibration, so you can safely test wiring before using the signal in a panel, scene or automation.

Signal configuration with green, red, yellow and white lamps assigned to Arduino ports.
11 / 12

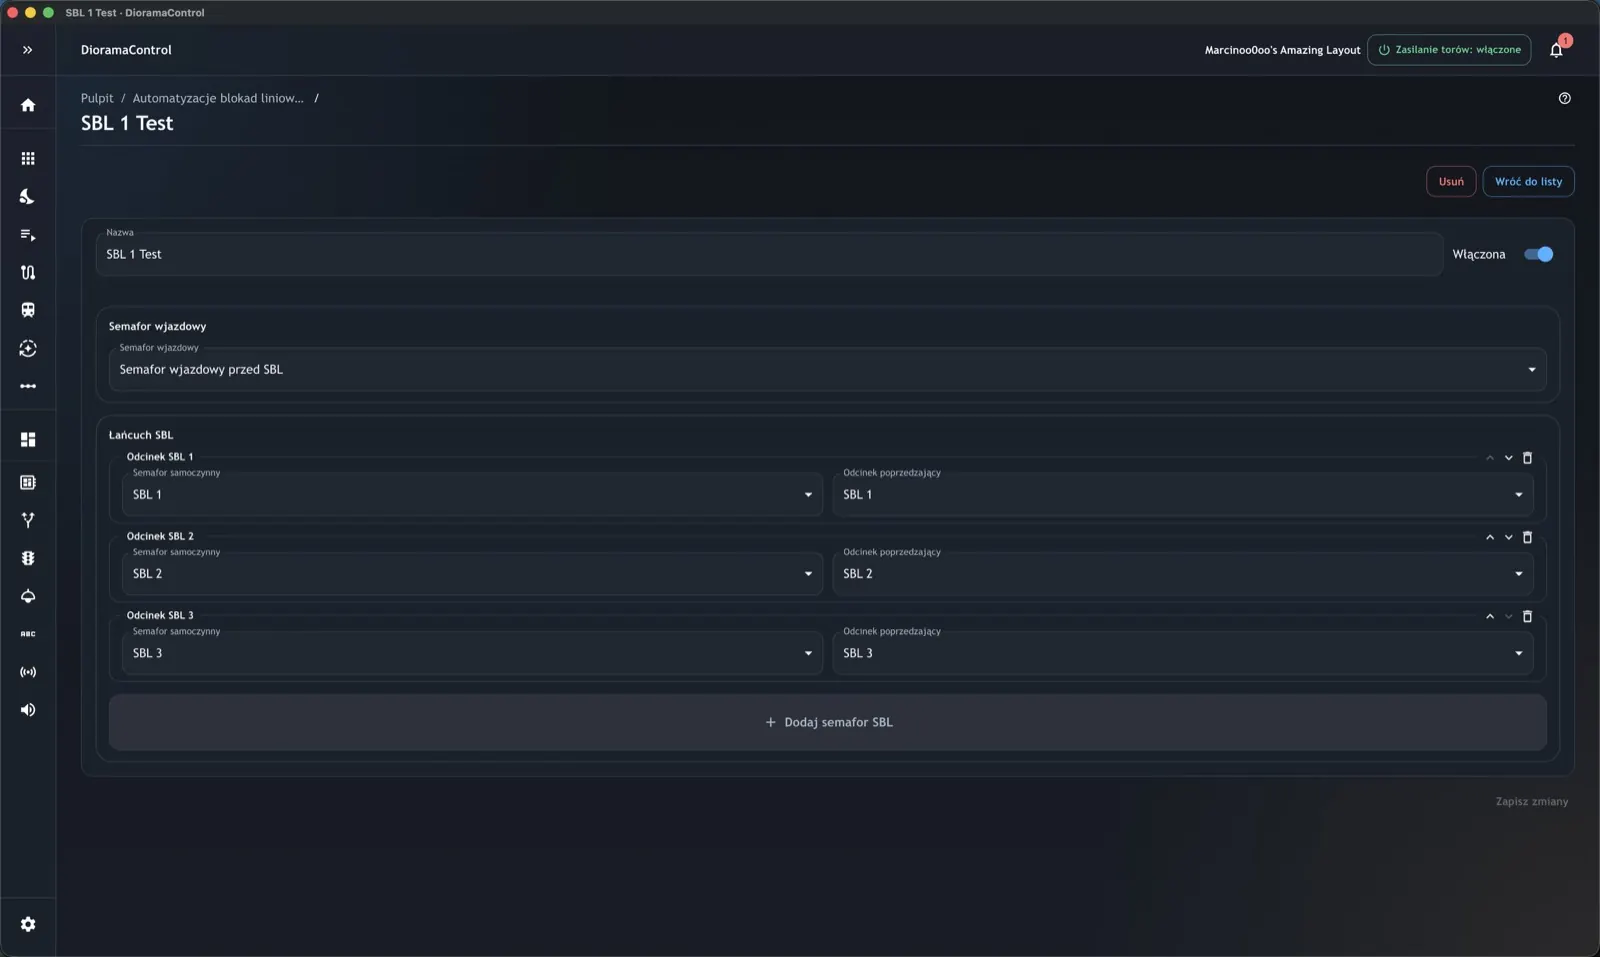
Configure automatic line block

Line block automation connects an entry signal with a chain of automatic block signals. Configure each block section and its preceding signal.

This speeds up building more realistic route logic, especially when the layout has multiple sections, sensors and signals working together.

Automatic line block editor with an entry signal and a chain of automatic block signals.
12 / 12

Test safely before operation

Before connecting an active layout, verify port mapping, power, servo directions, DCC addresses and emergency stop behavior. Test single components first, then scenes and automation rules.

DioramaControl helps organize the configuration, but wiring, power supplies and safe operating tests remain the layout operator’s responsibility.

DioramaControl dashboard used as a checkpoint before running the layout.

FAQ

Does DioramaControl support DCC?

Yes. The app supports DCC command-station control for track power, speed, direction, stop and decoder functions, plus a rolling stock catalog with DCC addresses, speed step modes and photos.

Does this guide apply to Windows, macOS and Linux?

Yes. The app interface is the same; the main differences are system port names and the installer for each platform.

Do I need real hardware to start?

No. You can begin with a test project and simulated mode, then connect drivers, sensors and a DCC command station later.

Ready to configure your own layout?

Download DioramaControl, create your first project and start with a small setup: one driver, one light, one turnout, one signal and one locomotive with a DCC address.

Download DioramaControl